Overview :
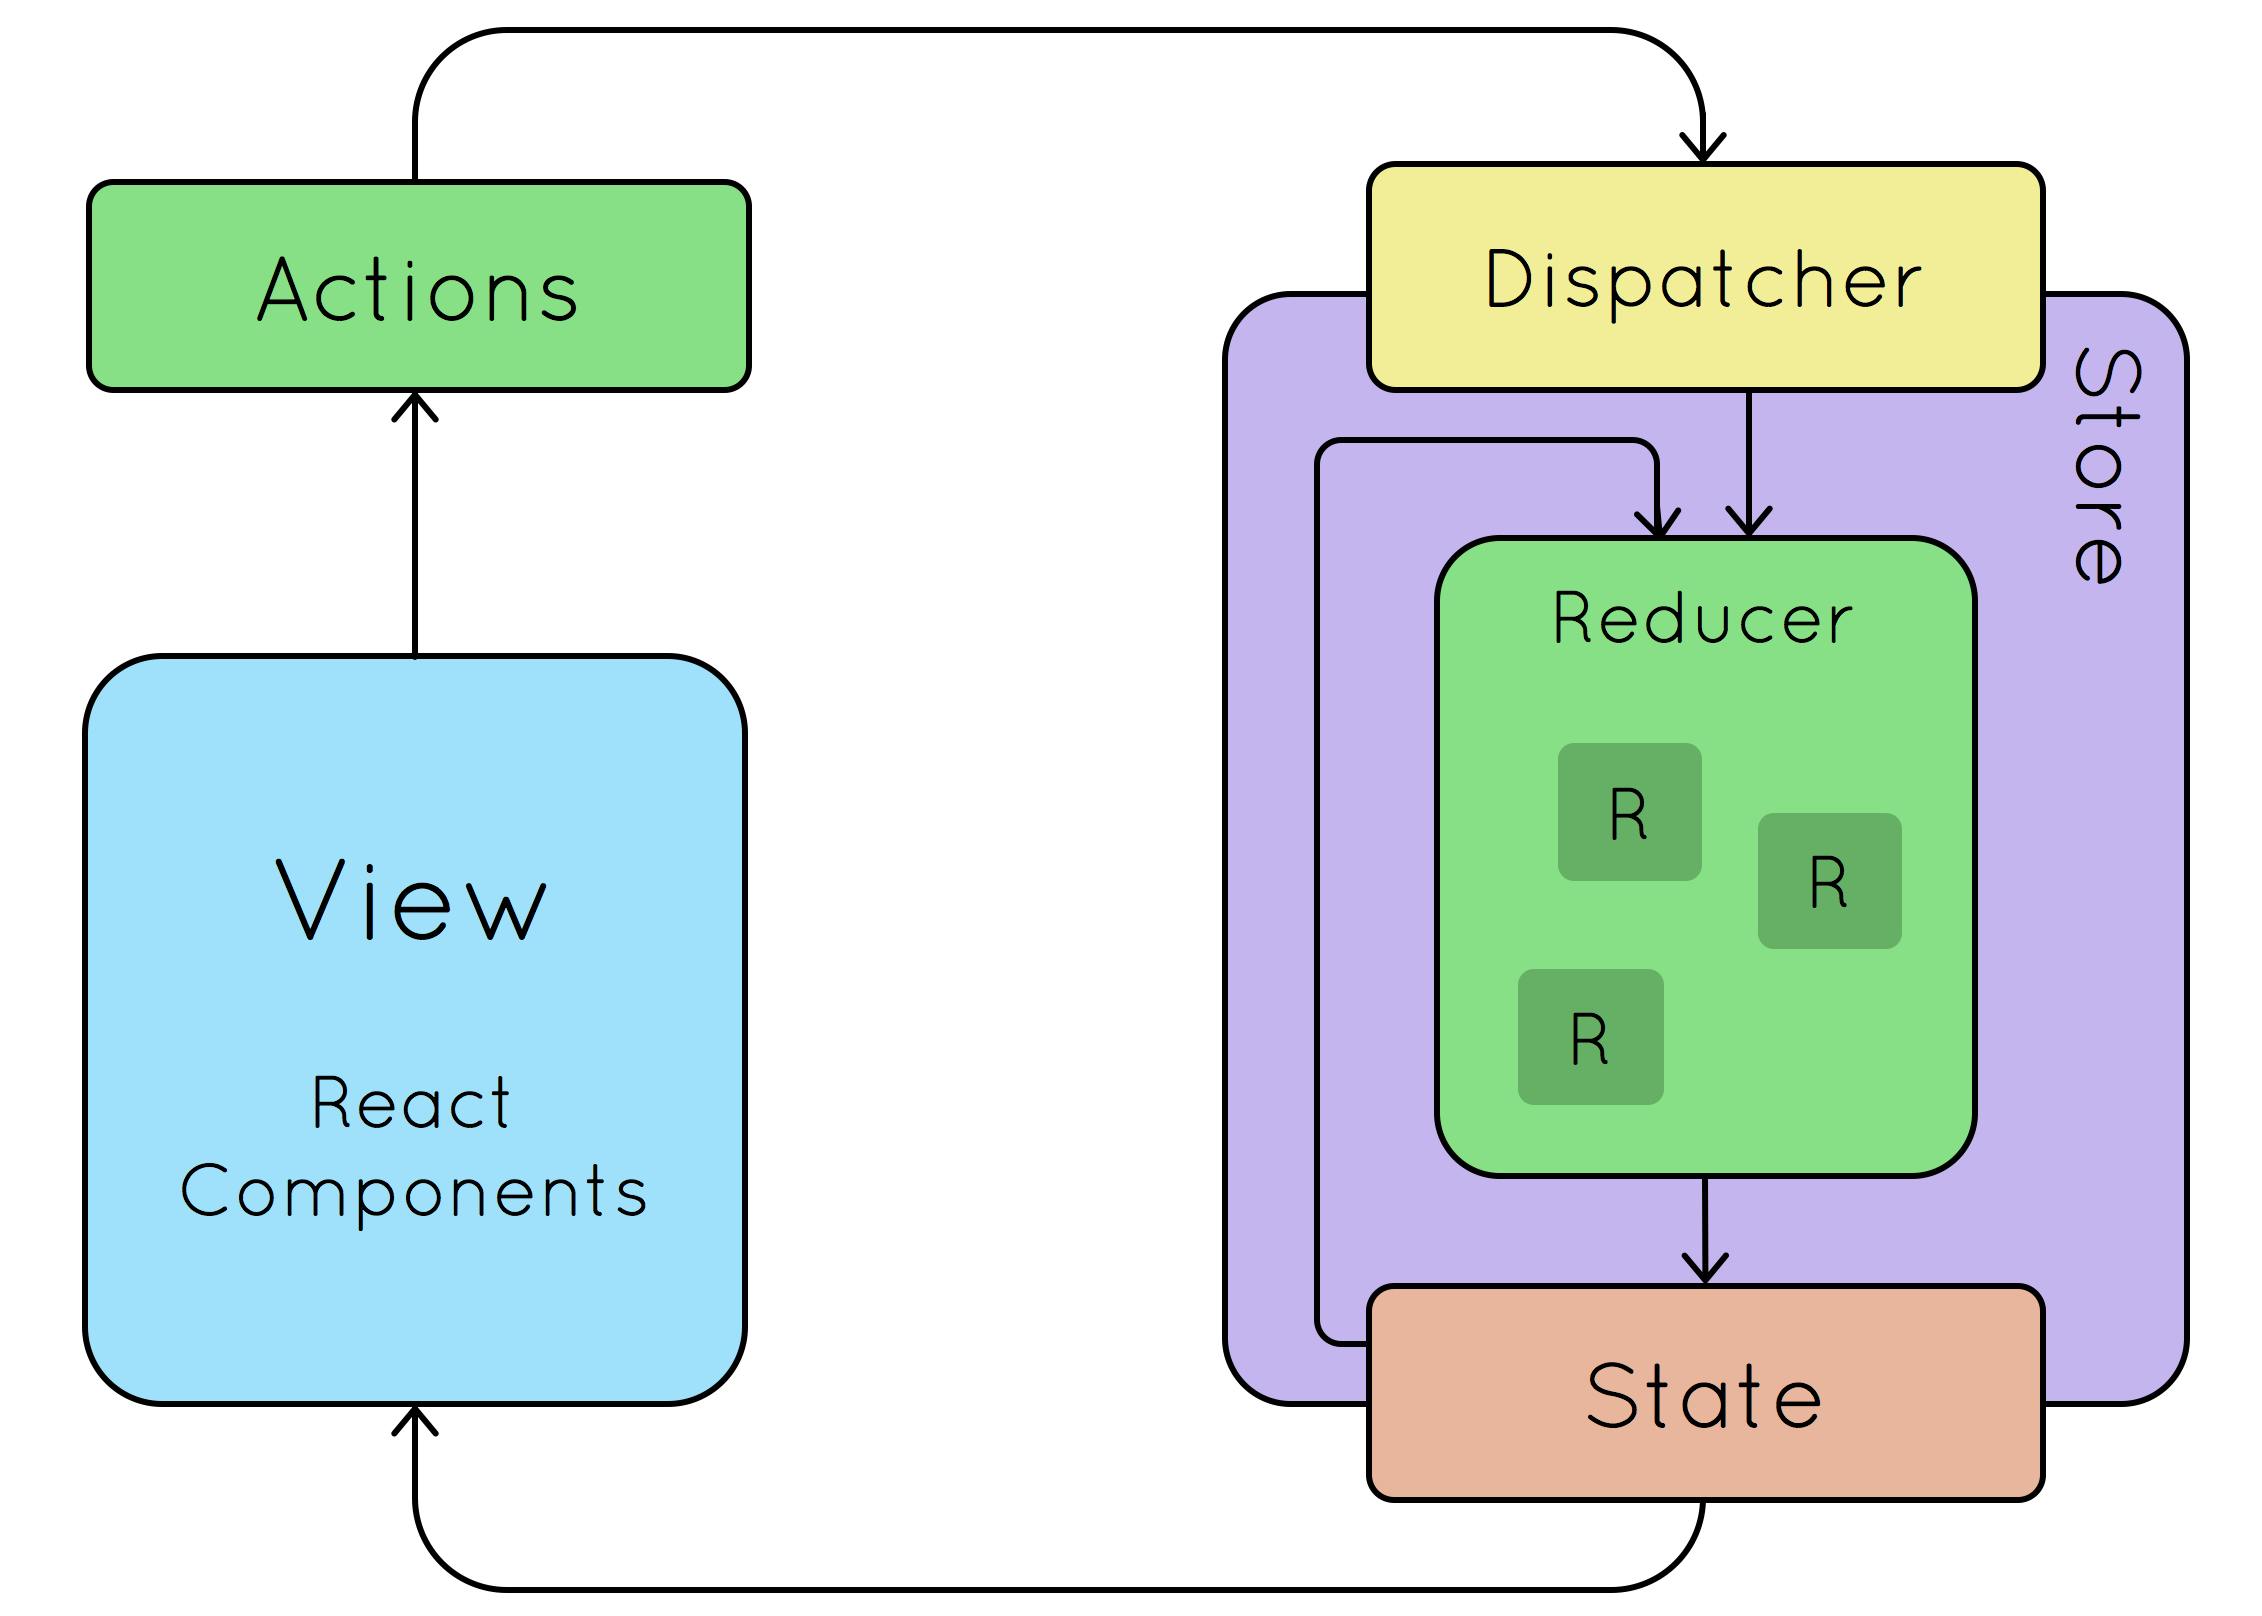
State management is a critical aspect of building complex web applications. It enables developers to maintain and manipulate data across different components effectively. Redux, a predictable state container for JavaScript apps, has been a popular choice for managing application state in React applications.
However, setting up and maintaining Redux can be cumbersome, often involving writing boilerplate code.
Enter Redux Toolkit, a powerful library that simplifies the process of using Redux while also providing additional utilities to streamline development. In this blog post, we'll dive deep into Redux Toolkit, exploring its features, benefits, and how to effectively integrate it into your projects.
What is Redux Toolkit?
Redux Toolkit is an official package provided by the Redux team to simplify and improve the development experience when using Redux for state management in your React applications. It's a collection of utility functions, conventions, and best practices that make it easier to write and maintain Redux code. Redux Toolkit aims to streamline common Redux tasks, reduce boilerplate code, and encourage good practices.
Installing Redux Toolkit:
npm install @reduxjs/toolkit react-redux
This will give you access to the React-Redux and Redux Toolkit packages. The next thing you will want to do is to create a ‘store.js’ file somewhere in your source folder.

Right now you can see that we have no reducers, but soon we will. First, we have to make sure our App can access the store, so we want to wrap our component inside of a component.

Now that we’ve passed down ‘store’ as a prop and our app has access to this global state, we can set up our reducers to help us update that state.
createSlice
Slices are a helpful update from the Redux Toolkit that lets us make multiple different stores as ‘slices’ of a whole store. We can put them all together, with their respective reducers, and make one global store, made up of many slices.
Let’s say we’re making a digital shopping app for our friend’s muffin store. Our friend wants us to keep track of all the muffins that a user clicks on, but also wants us to use LOTS of components. Luckily, Redux can help us keep track of all the muffins no matter which component our user is viewing.
Let’s start by creating a ‘muffinSlice’ reducer that will keep track of an initial state and any reducer functions we want to be available to us.
This is when we used vanilla redux :>>
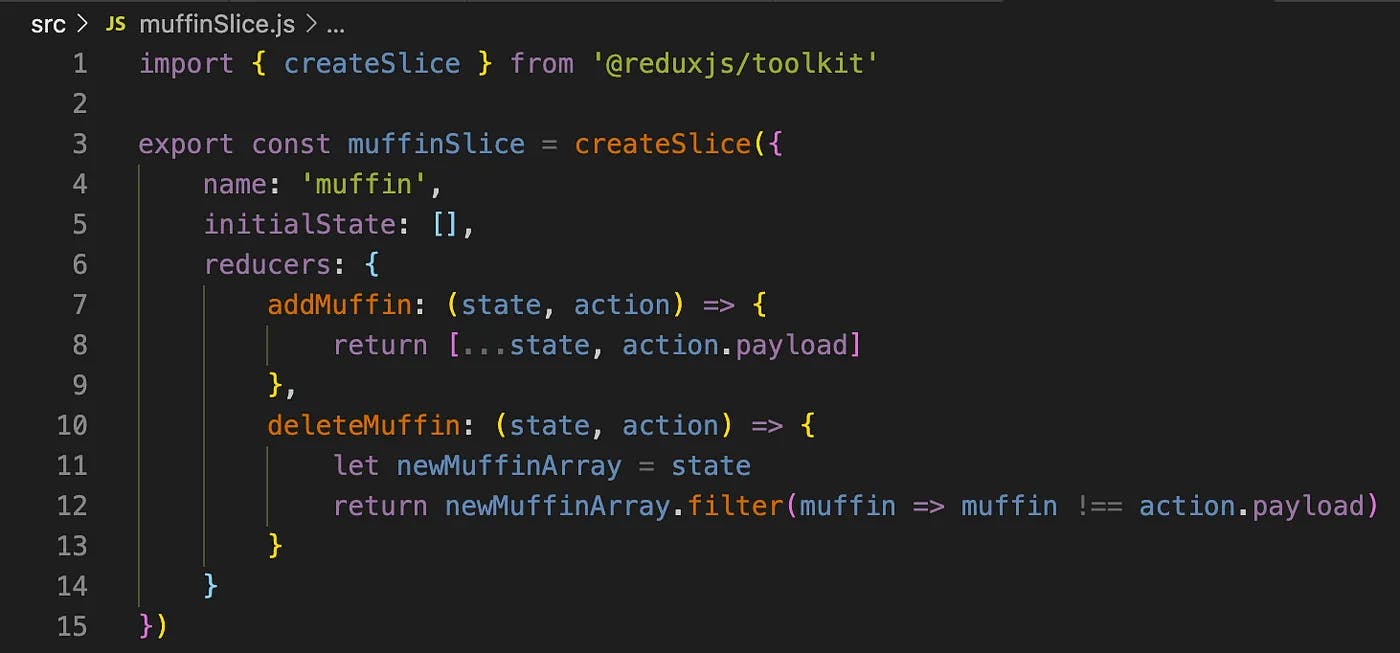
We started out by importing our ‘createSlice’ API to gain access to the createSlice function. We then gave our slice a name (‘muffin’), an initial state (an empty array), and some reducers (‘addMuffin’ and ‘deleteMuffin’).
Normally, Redux requires us to use something called ‘Pure Functions’ when dealing with our reducers. This just means that the function should create a copy of the state and mutate that as opposed to directly messing with the state itself and possibly running into async issues.
Luckily, the ‘createSlice’ API gives us access to Immer, which converts our impure functions into pure functions. So let’s refactor:

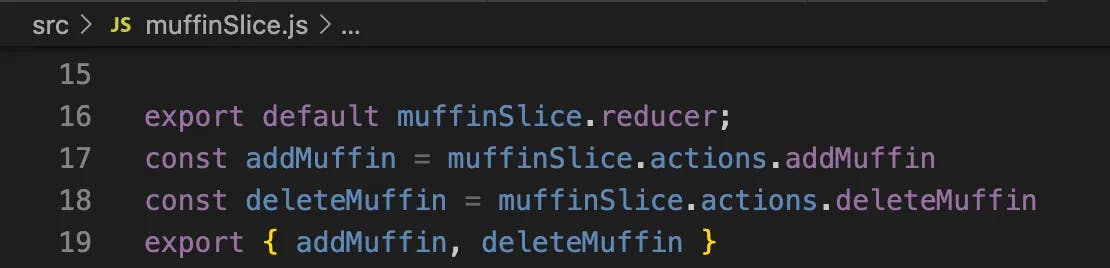
The (state, action) arguments allow us to have access to the state at that given time, plus any data we want to pass into our reducers through our action’s ‘payload’. Lastly, we can export our reducers and our slice to be used throughout our app.
And we should also remember to update our ‘store.js’ file with our new reducer!

useSelector and useDispatch
Now we’re set up! All that’s left to do is use our React-Redux hooks to both view and send actions to our store.
Let’s import ‘useSelector’ to view our store and ‘useDispatch’ will allow us to send out our actions. We also have to remember to import our reducer actions from the ‘muffinSlice.js’ file as well.

Here, we’re using ‘useSelector’ to grab the state that exists in our ‘store.js’ file under the name ‘muffin’. If we wanted to make a cupcake or a pie reducer as well we could add those to our ‘store.js’ and call ‘useSelector’ on them as well.
We also set up a constant called ‘dispatch’ which allows us to use our ‘addMuffin’ and ‘deleteMuffin’ actions in callback functions.

Here you can see we’ve used our ‘muffinList’ constant to display a list of all our selected muffins to display to the user. We’ve also added an ‘onClick’ event listener, which dispatches our ‘addMuffin’ action that we imported to add the delicious blueberry muffin to our global state.
Conclusion
Redux is a very helpful tool that just takes a little bit of setting up to get used to. This guide is for anyone who wants to dive into Redux without getting caught up in the semi-extensive setup. If you just follow along with the pictures and replace my ‘muffins’ with whatever you need to keep track of across your app, you’ll be in business.
Oh, and download the Redux Dev Tools for your Google Chrome browser to make checking your store updates much easier.